原生JS實現(xiàn)拖拽效果
本文實例為大家分享了JS實現(xiàn)拖拽效果的具體代碼,供大家參考,具體內(nèi)容如下
想要讓整個元素移動需要三個事件:
鼠標按下 onmousedown鼠標移動 onmousemove鼠標抬起 onmouseup
html
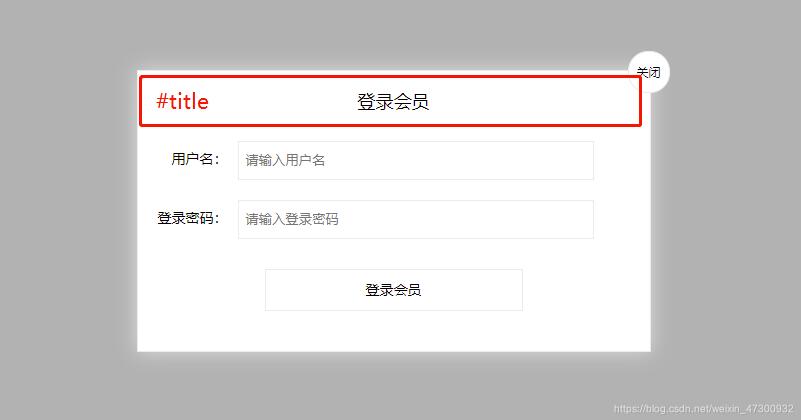
<div class='login'> <!-- 點擊title拖拽 --> <div class='login-title'>登錄會員 <!-- title end --> <span><a href='javascript:void(0);' class='close-login'>關閉</a></span> </div> <div class='login-input-content'> <div class='login-input'> <label>用戶名:</label> <input type='text' placeholder='請輸入用戶名' name='info[username]' class='list-input'> </div> <div class='login-input'> <label>登錄密碼:</label> <input type='password' placeholder='請輸入登錄密碼' name='info[password]' class='list-input'> </div> </div> <div class='login-button'><a href='javascript:void(0);' id='login-button-submit'>登錄會員</a></div></div>
JS
var login = document.querySelector(’.login’);//獲取整個彈框的內(nèi)容var title = document.querySelector(’#title’); title.addEventListener(’mousedown’,function(e){ //當按下鼠標的時候,獲取到鼠標在拖拽盒子內(nèi)的坐標 //鼠標在頁面的坐標 - 大盒子距離瀏覽器左側(cè)的距離 var x = e.pageX - login.offsetLeft; var y = e.pageY - login.offsetTop; //鼠標移動 document.addEventListener(’mousemove’,move); function move(e){ //拖拽的盒子定位=鼠標在頁面的坐標 - 鼠標在拖拽盒子的坐標 login.style.left = e.pageX - x + ’px’; login.style.top = e.pageY - y + ’px’; } //當鼠標抬起的時候,將移動事件刪除 document.addEventListener(’mouseup’,function(){ document.removeEventListener(’mousemove’,move); }) })
CSS部分
<style> *{ padding: 0px; margin: 0px; } .login { display: block; width: 512px; height: 280px; position: fixed; border: #ebebeb solid 1px; left: 50%; top: 50%; background: #ffffff; box-shadow: 0px 0px 20px #ddd; z-index: 9999; transform: translate(-50%, -50%); } .login-title { width: 100%; margin: 10px 0px 0px 0px; text-align: center; line-height: 40px; height: 40px; font-size: 18px; position: relative; cursor: move; } .login-input-content { margin-top: 20px; } .login-button { width: 50%; margin: 30px auto 0px auto; line-height: 40px; font-size: 14px; border: #ebebeb 1px solid; text-align: center; } .login-bg { display: none; width: 100%; height: 100%; position: fixed; top: 0px; left: 0px; background: rgba(0, 0, 0, .3); } a { text-decoration: none; color: #000000; } .login-button a { display: block; } .login-input input.list-input { float: left; line-height: 35px; height: 35px; width: 350px; border: #ebebeb 1px solid; text-indent: 5px; } .login-input { overflow: hidden; margin: 0px 0px 20px 0px; } .login-input label { float: left; width: 90px; padding-right: 10px; text-align: right; line-height: 35px; height: 35px; font-size: 14px; } .login-title span { position: absolute; font-size: 12px; right: -20px; top: -30px; background: #ffffff; border: #ebebeb solid 1px; width: 40px; height: 40px; border-radius: 20px; }</style>
以上就是本文的全部內(nèi)容,希望對大家的學習有所幫助,也希望大家多多支持好吧啦網(wǎng)。
相關文章:
1. Python基于traceback模塊獲取異常信息2. python開發(fā)一個解析protobuf文件的簡單編譯器3. ASP編碼必備的8條原則4. python 根據(jù)列表批量下載網(wǎng)易云音樂的免費音樂5. python中round函數(shù)保留兩位小數(shù)的方法6. python 基于AioHttp 異步抓取火星圖片7. 利用python+ffmpeg合并B站視頻及格式轉(zhuǎn)換的實例代碼8. 解決Python數(shù)據(jù)可視化中文部分顯示方塊問題9. C語言字符串轉(zhuǎn)換為Python字符串的方法10. 深入理解JavaScript字節(jié)二進制知識以及相關API
 網(wǎng)公網(wǎng)安備